• 23 Posts
  • 58 Comments
Joined 1Y ago
cake
Cake day: Jul 08, 2023

help-circle
rss

Use ASA. PETG will creep.

ASA will creep significantly less. If you have fibre-filled materials they also excel in this regard but are probably overkill here.


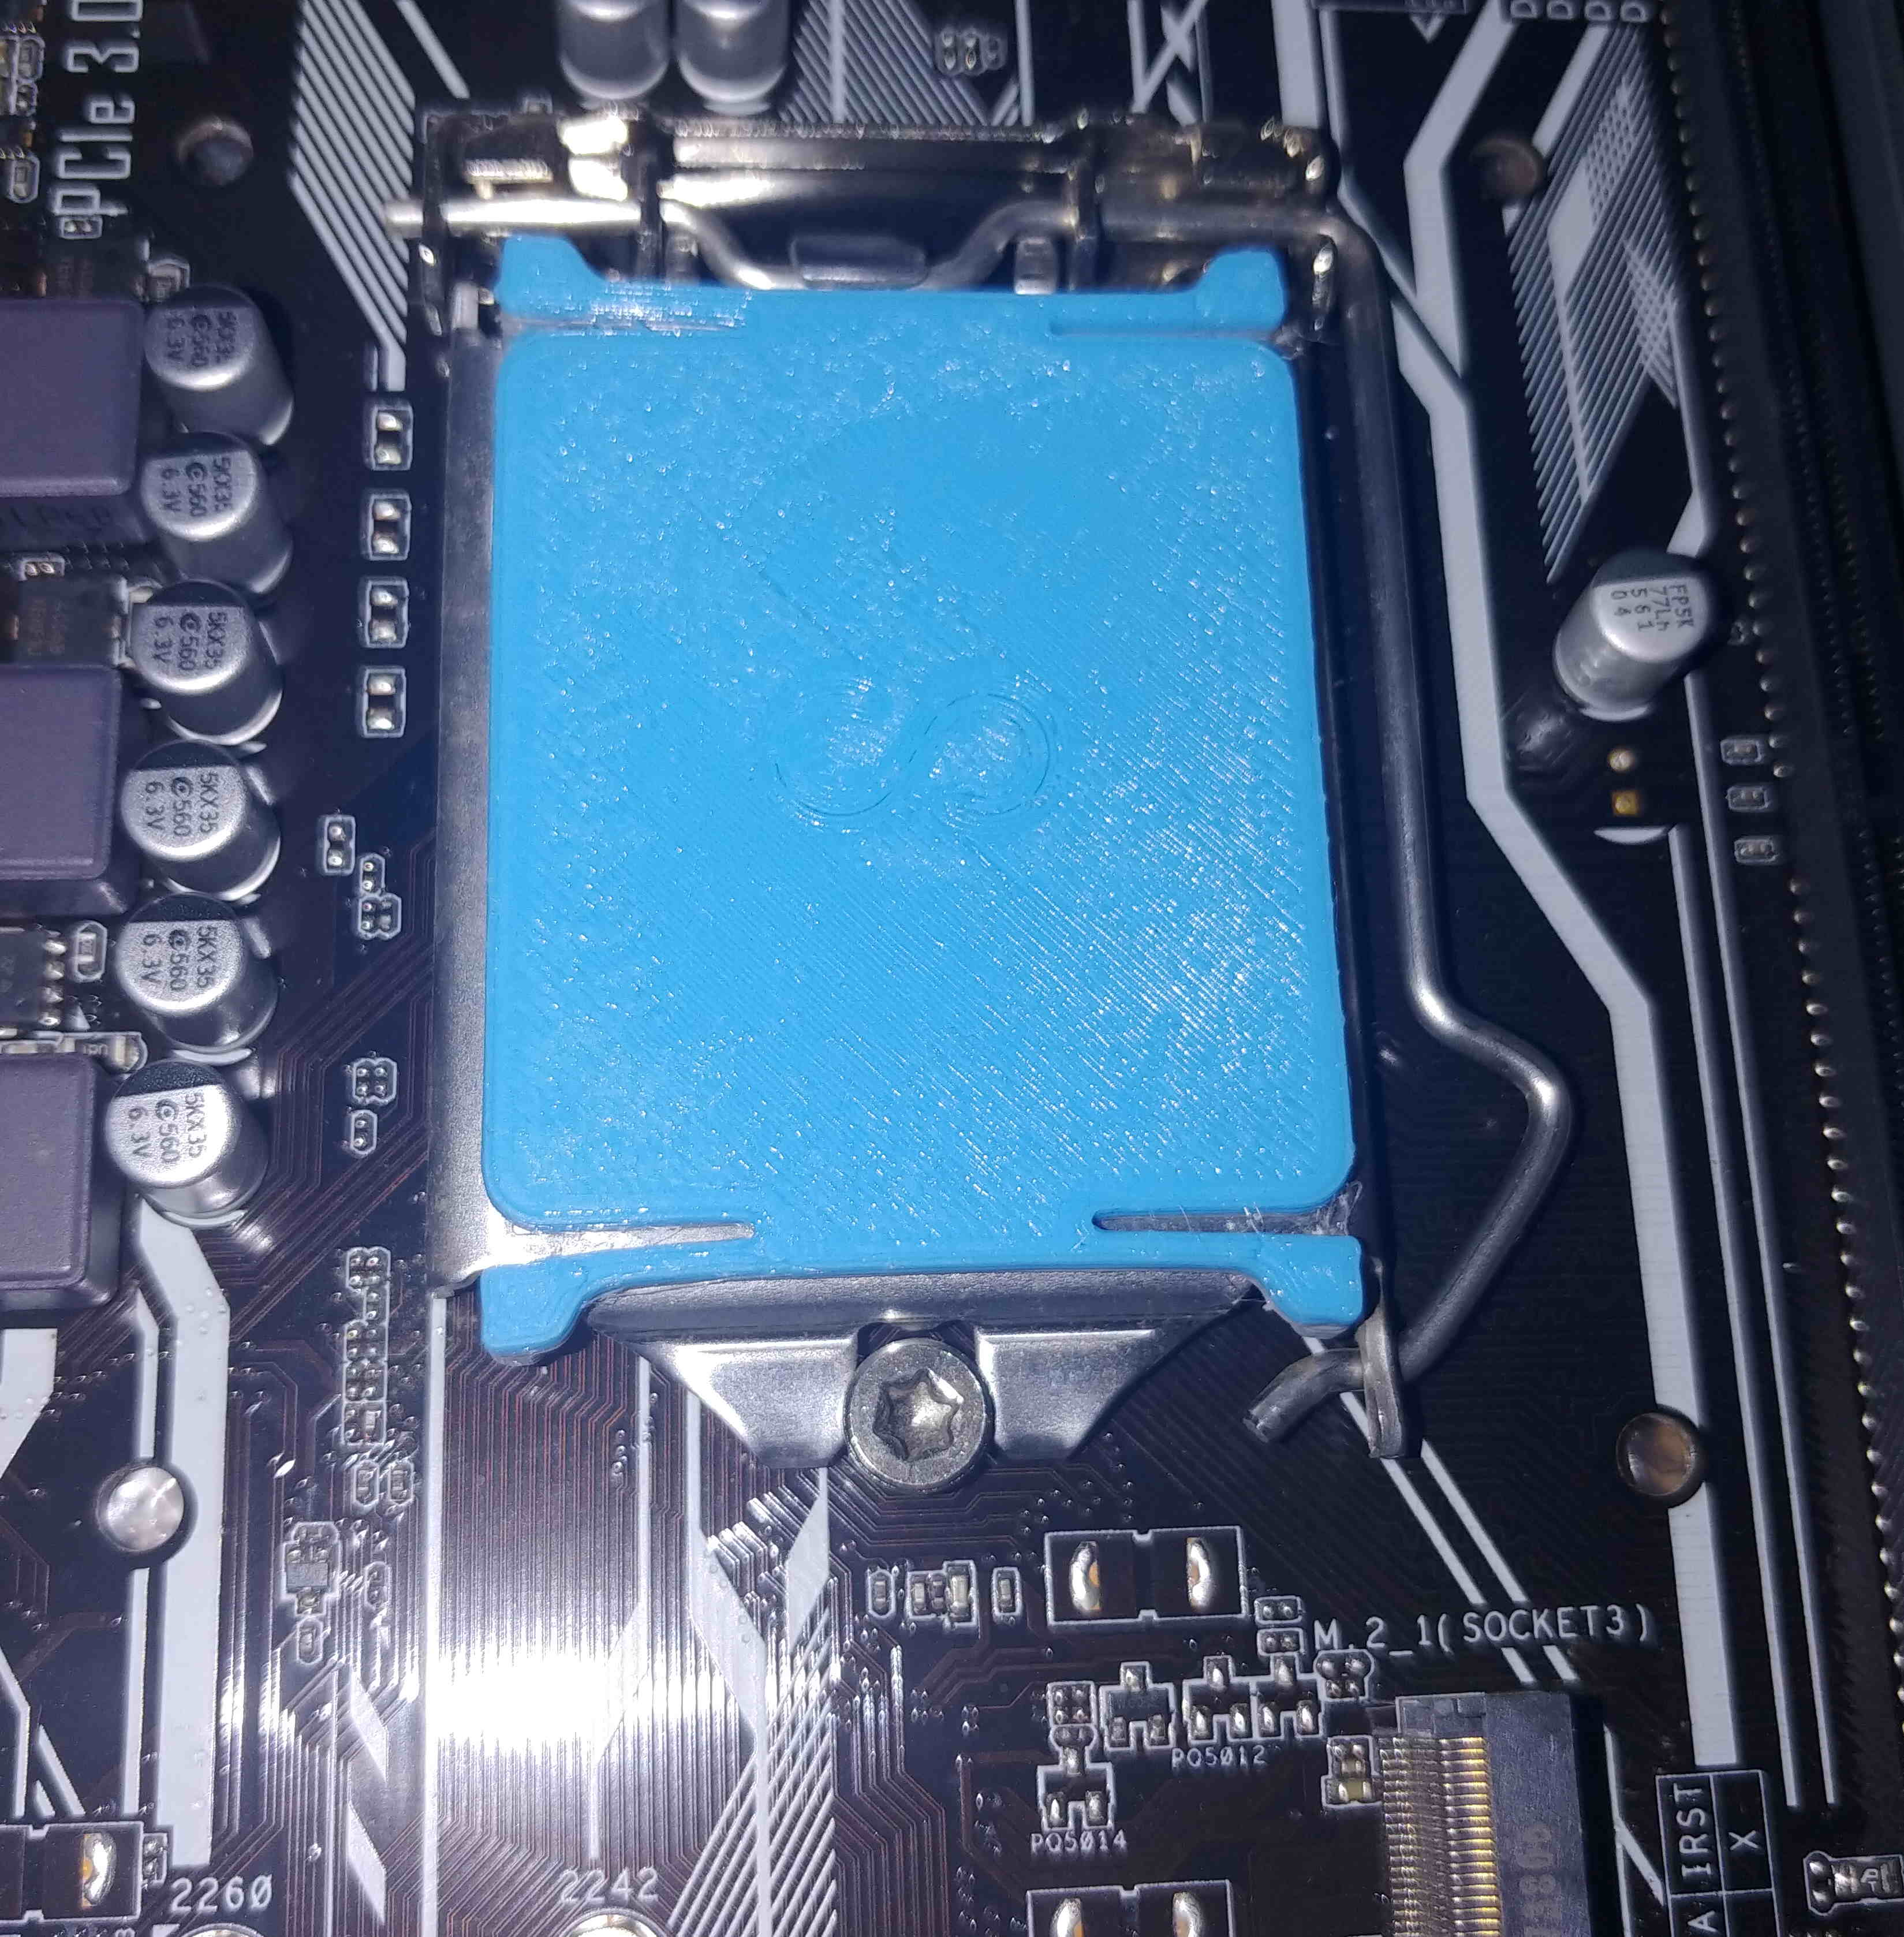
PETG will creep even at temperatures below 80°C and the higher the temperature is the faster the process is: https://en.wikipedia.org/wiki/Creep_(deformation)

I have a small collection of parts that all experienced creep (as a showcase). Structurally they where all fine in simulation and practice. Over time they all failed due this deformation.


Interesting 3D printer design.

Using 3 linear rails to mount the bed. I suppose each linear carriage is one “corner”/point and all three of them to define a plane without overconstraining the buildplate but you keep all of the rigidity of the linear rails?

The issue I see is that the three linear rails in one plane are overconstrained so it is still is a pain to setup (especially on an ender 3 like frame construction).

What is the reasoning for using two motors instead of one powerful in the middle?


Should I distill IPA (isopropanol alcohol) at home for 3D-printing?
**TL;DR No.** **What you should do:** - buy fresh IPA. It is approx. $5/L. As such a 2L washing bin is approx. $10 + 10L waste disposal. In the broader picture of total costs and production value, this is manageable (resin cost, machine depreciation, PPE/gloves, ...)! - use two or three stages of washing - fill the washing containers with as little as necessary to get it done - periodically expose the liquid to sunlight and let the particles settle down. Separate the "clean" liquid from the sump (you might add special chemicals to speed up this process). - if the first stage needs replacement: 1.) responsible disposal of the liquid in compliance with local regulation 2.) move the liquids around: (the third stage is the new fresh liquid, the second is the prior third stage and the second washing station is now the first "dirty" stage). - check for alternative chemicals that can be used with your particular resin If you use water-washable resin: IT IS A DANGEROUS LIQUID! Dispose of dirty water responsibly as chemical waste. **Long answer:** To answer that, let's first look at what isopropanol (IPA) is: Its formal name is propan-2-ol and its CAS number is 67-63-0. As a starting point, check a database like GESTIS (German) and NOT wikipedia: https://gestis.dguv.de/data?name=011190 At the top of the page we see that it has GHS-02 and GHS-07 warning labels. Looking further, it is a colourless liquid with a flash point of 12°C and an ignition point of 425°C. The explosive range is 2-13.4% vol. The signal word is DANGER. Scrolling down: > The substance forms explosive peroxides. What does this mean? There is no mechanism mentioned, but generally, if you expose these chemicals to sunlight they will react over time to form a peroxide, which is much more reactive and can explode at high concentrations (there are exceptions to this rule, but most of them go boom). This means for distillation: - avoid "old" IPA if possible - check for peroxides (if necessary, treat the peroxides before distillation) - don't distill dry (leave some liquid in the sump to avoid high concentrations of peroxides) As I believe this shouldn't be done at home I won't tell you how it can be safely done (if this isn't enough to deter you: read scientific literature/books describing how it shall be done). Instead, focus further on what advice is out there on the internet/YouTube: - A water distiller is made for water and water isn't flammable and doesn't form explosive atmospheres. In other words they are unsafe for Isopropanol or Ethanol. - Do you think a 2kg fire extinguisher is enough? Are you truly capable of thinking rationally when there is a fire or would you panic like most people? - Don't even consider doing it indoors or in a garage. - Don't work with large volumes. In a laboratory with proper fumehoods and equipment, there might be limits like 500mL batch sizes. - If somebody isn't wearing eye protection or heating large amounts of liquid without stirring **question his qualification to talk about this topic.** Being an influencer or posting online, like this post, doesn't require any formal qualification as such even the big YouTubers/influencers post horrendous content that is dangerous or misleading.
fedilink

Prusa MK4s launch (TLDR)
Prusa video: https://www.youtube.com/watch?v=VO2MaQrUcqE TL;DR For those who don't want to watch 10-minute video: 0. MK4 to MK4s uprade kit: 109€ + shipping (MK4 customer will receive a voucher (except shipping cost)) 1. Larger cooling fan 2. Improved cooling duct 3. high flow nozzle 4. NFC for app 5. some parts upgraded from PETG to PC-CF 6. MK4s still ship without an accelerometer. Prusa claims this isn't needed. 7. No camera. 8. No upgrades for the Prusa XL in the near future!!!! other stuff: - accelerometer board - GPIO board Personal Opinion: This should have been the MK4 to begin with and shows once more how blindsided Prusa was. BambuLab put so much pressure on them that they had to publish the MK4 in the state it is. Regrading the Prusa XL the trouble continues. This launch/printer has been riddled by issues after issue and now the statement that the improved part cooling won't make it to the XL in the near future.... My guess it that they screwed up with the XL and didn't consider large toolheads at the design stage favoring a 5 toolhead design over a 4 head option and now run into the same issue I do with the E3D (it can fit those 6023 fans but not like they mount it on the MK4s). For example, with my E3D tool changer, a tool must fit within a 85mm(w) x 60mm(depth) surface area. For the technical side? The larger fan is great as it allows to use fans with decent pressure at the target airflow with a low noise. Those 4020 found on most printers aren't a great choice. High flow nozzle? Yeah ... nothing groundbreaking or new. NFC and app? A year ago was prusa connect at best a beta. Maybe a an alpha as I would need to restart the printer twice a day because it froze/crash. The value here depends on if they meanwhile fixed it or it is still a joke. GPIO board? Depends. Might be held back by the firmware as those things require macros to be useful and Prusa firmware never was build around this idea. Still nice to see them publishing this.
fedilink

Quick upgrade for easy to plug and unplug end effectors/toolheads. Activity/status LED are also moved from the back of the printer to the top and some more voltage regulation to provide additional voltage rails. While a nice connector adds significant cost it is also a big value add for certain 3D-printer. I think more manefacturer should consider tiny details like this when designing their product. Strain relief isn't installed on this tool for reasons ... ![](https://lemmy.ml/pictrs/image/16065862-8e2c-4b6f-824e-7680ddc418ed.jpeg)
fedilink

You should be fine. It is about temperature and time. Don’t keep the nozzle heated up when it isn’t used. Don’t dry it frequently (keep it in a dry environment) and use low temperatures.

190° is the low end of printing temperatures. SainSmart should probably be okay when printed below 210°C

With “special” PVA like FormFutura Helios you go up to 250°C: https://formfutura.com/product/helios-support/

Regardless BVOH should be the better choice at higher cost.


PVA would come out in big bubbles instead of thin lines.

Dry the PVA before use and keep it dry.

PVA easily crystalizes and if this happens the $30 filament spool is trash. Also, make sure to drop the temperature by more than 5°C for the parked toolhead. Otherwise (you guessed it) it will crystalize and cause a clogged nozzle.

<Rough time estimate is 5-30 min at PLA temperature with no flow but this number depends on the exact PVA filament variant.


Import the parts into the CAD software (e.g. Fusion360) and assemble them.


You’re mad that the contest was moderated?

More the opposite. The sloppy way they moderate it to the point where they don’t even bother to remove comment spam below the contest description page.

Voters voted on the submissions they liked the most. Get over it. Voters voted on the submissions they liked the most. Get over it.

That’s not how it works. There is no public vote.

Honestly I stopped reading. Something about a paid part integration that you got mad about because it’s heavily discounted and you can submit photos even if you don’t have one or something?

Just read the comments here: https://blog.prusa3d.com/contest-experiential-robotics-challenge_97306/

Dozens feel like this isn’t a good choice.

Btw. I don’t take part in them but it is still very ugly what they do. Similiar you don’t need to buy Nestle to understand that Nestle might be problematic in some aspect.


Let’s talk about Prusa Printables contests. It might need some fixing.
Currently, Prusa is doing a terrible job with the Printables competition, to the point where they could be in legal trouble if someone were to push for it. A few examples to prove this statement (5th is in my opinion the worst): 1. insect hotel -> canceled due to security concerns. Great work, but why not look into it before you start and provide a design guideline? https://www.printables.com/contest/436-insect-hotels 2. Bathtub toys -> Mentioned explicitly: "Safety is our top priority, so make sure your creations are child-friendly, [...]". As these are bath toys, one might assume that they mean safety standards for young children. https://www.printables.com/contest/428-bathtub-toys Great. Safety is a top priority. So let's see how they moderate it. They haven't... If you scroll through the valid submissions, there are dozens that aren't safe for children. Prusa is EU, so I would expect them to be familiar with the basic EU regulations for children's toys when they say we want safety first. There are very strict test requirements that a toy has to meet. The simplest one is a bin/cylinder that a part cannot fit into (choking hazard). Does every design meet this very basic design rule? No. Next comes impact resistance and the like. Does the design meet these requirements? no. You could say that it's just not feasible to review every submission, so let's take a look at the winning entries that they definitely looked at: Rubber Band Submarine. I'm not a toy designer, but I'm pretty sure that an exposed rubber band is not safe for small children, who are the target audience for bath toys. 3. fish tank tweaks: Recommending PLA for prints that are permanently submerged ("It is usually recommended to use ABS or specific food-safe PLA..."). Seriously???? These days they are PLA under these conditions is rubbish within a year. Discoloration and expansion destroy some PLA blends/filaments. 4. soldering aid: Seeing this design as a winning soldering aid raises serious questions as to whether the person involved has any practical experience in assembling electronics. Placing a PCB 2cm in the air with sharp objects around the mounting holes is the opposite of ergonomic and comfortable SMD soldering: https://www.printables.com/model/740818-parametric-stackable-pcb-standoffs-m2-m14-holes ****5. This contest had questionable practices and here's where things get wild. Now we're not just talking about knowledge gaps, we're talking about breaking your own rules, which could be a legal problem. One of the contest rules states: "A valid entry may change its slope, altitude or distance." Simple. Right? Not for Prusa: https://www.printables.com/model/837104-the-rig-r11-diy-helper-stand-for-testing-electroni This is a winning entry that can't do any of those things, and would probably qualify as a generic holder (also not a valid entry). Another winning entry that wouldn't be a valid entry if Prusa followed the contest rules: "Skip the organisers: We love a tidy workplace, but today we're focusing on ergonomic improvements": https://www.printables.com/model/808502-heat-insert-press Want a third from the same competition? Here it is: https://www.printables.com/model/808502-heat-insert-press "Specific adaptability: Designs must provide flexibility in the user's interaction with the tool or aid (height, tilt, distance or orientation adjustments). Simply accommodating different sizes of objects doesn't quite fit the bill". To recapitulate, Prusa broke the rules not once, not twice, but three times within this competition (which, being EU, has some legal requirements on how you can and can't run competitions) by awarding prizes with monetary value and talking them away from other competitions that followed the rules. There is more wrong with how this was organized/done, but I think this is damning enough. Never assume evil, so I would kindly call it Prusa being utterly incompetent.**** 6. The current XPR challenge. Design a part for a robotics kit. Sounds exciting. First bummer, it's $115 + tax, but that wouldn't be noteworthy enough to write this: 6.1 To design for it a.) either buy it (providing a $35 discount if you do so) or b.) try to work with whatever this is: https://www.printables.com/model/576581-xrp-robot-part-of-the-experiential-consortia/files the picture shows a complete model with PCB and sensors (some connectors and wiring are missing) but would be workable. What do they actually deliver? The frame with no electronics or components. Good luck working with that. 6.2 While this may or may not go in the direction of predatory, there is more: "Photo quality - Well lit, in focus and clear photos will help showcase your work and help us choose the best designs." Quick questions: How do I take good and compelling photos without the $115 robot kit? | Prusa: "This also means that you don't need to own a 3D printer to enter". Question: "How do you make photos without a 3D print to show of? the wording is very clear that they mean photos and not computer 3d-Render. Just by looking at these two aspects, this thing has a $115 + tax ticket to improve the "chance" of winning. 6.3 Moral issues: This work is unpaid to begin with. Does Prusa really expect people to spend tens of manhours working on a good design, printing it, taking pictures, writing instructions and text, when they have absolutely no use for it themselves, since this kit has probably only been sold a handful of times to end users. There is only a small chance of wining something (remember exhibit 5 where they didn't even follow their own rules)? Last but not least: "Popularity – Share your model to increase its popularity, and prove that users appreciate such a model." This is fairly common for some events and I always dislike it as this asking for free advertisement. Prusa at least limits it to the model itself while others use a broader approach where it is for the entire project/organization. Regardless such terms always have a negative impact. Just remember all the MakerWorld spam everywhere after they launched with high rewards.
fedilink

How often do you lubricate the linear guides?
I am curious how often do you service the linear rails on the 3D-printer: - How often do you lubricate them (MGN9 or MGN12)? - How do you lubricate them? - What volume of lube do you use? ::: spoiler Explanation of how often you should do it (HIWIN Lubricating instructions for linear guideways and ballscrews) Most 3D-printer use MGN12. Reading the HIWIN documentation they shall be lubricated every 20-50km (depends on a lot of factors). How much is 50km in print time? Assuming an average speed of 300mm/s that would be approx. 46 hours! In other words, the generic MGN12H carriage needs 1-2 times per week maintenance. How much lube is suggested (horizontal mounting)? 70µL for MGN12H. For MGN9H it is 30µL! :::
fedilink

Some aspects of Printables are “wrong”. Contests are a total mess at the moment. I might make a serape post about it.

This? Looks like a glitch/bug. As far as I can tell this is only active on paid items which makes sense.


With mainsail and klipper, you can cancel one failed part mid-print and keep going on the rest of the parts.

There is an addon for Duet (RRF) but I can’t get it working. Anyway, once it is time for a batch print the first testprint has been completed successfully and build plate adhesion is a non-issue on this printer.

You have to tell it the dimensions of your extruded head, so it doesn’t crash the part Ask me how I destroyed two z-endstops this year (very asymmetrical toolhead and Prusa can’t be configured to reflect this and with a “radius” large enough it would block half of the printbed (60mm radius or so) meaning eyeballing is the best option).

I only use this option if I need the part before the entire batch is finished and don’t want to start multiple prints. Which isn’t frequent.


Nesting capabilities of slicer (overview)
Short overview of how good the nesting capabilities of various 3D slicer are. The task is simple: placing as many of these shapes on a 200x300mm printed as possible. Manual (quick and dirty for reference): 6 pcs. ![](https://lemmy.ml/pictrs/image/cfa27fb8-0912-4720-8e02-6706d06398ee.png) Ranking: 1. Ultimaker Cura: 7 pcs. 2. human (me): 6 pcs. 3. Orca slicer: 5 pcs. 4. PrusaSlicer & BCN3D stratos: 4 pcs. By switching (for this particular part) from the worst (Prusa) to the best (Cura) slicer the nesting performance improved by a whopping 75%! Ultimaker Cura: ![](https://lemmy.ml/pictrs/image/9293a3ce-2ddd-4284-9d66-489875f44cf8.jpeg) Prusa: ![](https://lemmy.ml/pictrs/image/20a78b39-8e20-480a-ad06-4eef92a0f979.jpeg) BCN3D Stratos (forked from an old version of Cura): ![](https://lemmy.ml/pictrs/image/ca7144db-b518-4ca7-b54e-75b27ecce10a.jpeg) OrcaSlicer: ![](https://lemmy.ml/pictrs/image/71d29899-ade1-416f-9862-5d22035e4f9c.jpeg)
fedilink


After half a dozen iterations, this was the first reasonably working, acceptable feeling, and good-sounding ratchet mechanism. allows clockwise rotation blocks counterclockwise rotation design features: - allows for a large inner bore (e.g. rotary encoder shaft or 5.2mm screwdriver bit) - printable with 0.4mm nozzle - 2cm diameter - no assembly required. Print in place. To get a full ratchet: mirror the assembly and add a mechanism/part that pushes one of the springs out. In neutral both leavers are engaged and the ratchet is completely locked. Btw. Good luck copying it without going through half a dozen of iterations. Going from it barely works to this isn't easy. For my part: Version 5 was working and close to the final design. It took another 10 rounds to get it usable and from there some more to fine-tune it.
fedilink

Printing fast/without cooling can also go the other way:

By printing very fast the last layer may still be “hot” when the new layer is added. As the temperature differential is smaller there is less stress within the part once it is cooled down.


Place them outside the heated chamber.

For motors, the limit is the wire insulation so might get away with 100°C ambient. If you can’t move them out there are also water-cooled extruders: https://www.dold-mechatronik.de/mebs-Hemera-WaCo-Mod-EN


Try with fans disabled or slowed down and enable draft shield in the slicer. Ideally the printer would have a 60-100°C heated chamber.


Quick and dirty 5 minutes craft: Draw a rough shape, define the contact surfaces & load, click run, and get the optimized shape. The last step is converting the output to a printable shape and running one more simulation to double-check it is strong enough. This particular holder is a filament spool holder designed to be loaded with up to 5.5kg of filament (1x2.5kg, 3x1kg).
fedilink

I have seen on some budget printers a label with which direction is up and down so that’s a starting point. Also a lot of prints out there to add this information to the bed leveling wheel.


Sadly it is not limited to cheap printer. Check out Thomas Sandlander on the Dagoma: https://www.youtube.com/watch?v=Zys1ZoyvLU8

While this printer is an extreme example other “pro”/expesnive printer have similar issues.


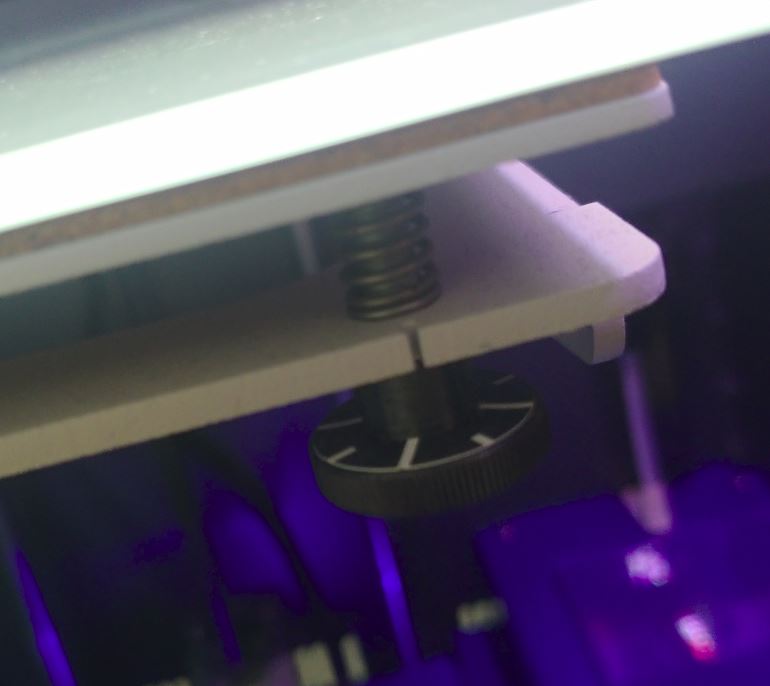
How much do you need to turn the knob for 0.3mm? Most people don’t know the answer so they make a guess which is likley wrong.

If the firmware converts 0.3mm to 1/2 rotation it is clear what they should do. This particular printer probs itself after the adjustments and if it isn’t right it shows once more the dialog/instruction with the adjusted rotation value. After 2 rounds, you would already have accounted for the manufacturing tolerances.

This process can be ontop of ABL and z-offset dialog (eyeball it with a shim, testprint, tell the printer which looked the best, the firmware knows what z-offset was each of the 5 prints/lines).


Building a 3D printer is easy. Getting the details right to build a great 3D printer is hard, as this is where most companies fail. Why? For example, on this printer, the bed is a three-point mount (two wheels for adjustment at the front of the printbed) and the printer's bed levelling dialogue doesn't show the height difference that needs to be adjusted (which most 3D printers do). It does show how much it needs to be turned, and the bed levelling wheels have 1/8th turn indicators, making it easy to get it perfect. In short, instead of an arbitrary number like 0.3mm that has no meaning to the user, they tell the user to turn this knob 1/4 of a turn. An instruction the user can follow. ** Why is this so outstanding? It doesn't cost much, but it improves the user experience. Are companies blind to these improvements because the engineers are experienced, or is there a lack of testing during development?** By the way, years ago I did such a fix/modification myself on a Tronxy XY2 pro by adding indicators on the wheel for 0.2mm height difference so I could convert the number to rotation: https://www.printables.com/model/301670-replacement-bed-leveling-wheel
fedilink

What I would like to see is a far more advanced solution where you could for example machine features which will be inaccessible once the print is finish.

Right now the tools for none industrial machines are basic as it feels like you are feeding a slicer output to a CAM package but the slicer isn’t designed with this in mind (e.g. printing certain features that will be machined lightly larger and everything else at normal size).


For those venturing into 5-axis 3D printing and hybrid manufacturing, what is your tool chain?
With 3D printers like the Open-5x or tool changers (e.g. Prusa XL) both, 5-axis simultaneous 3D-printing as well as hybrid manufacturing (additive followed up by subtractive), is more accessible than they ever were. **For those already venturing into this endeavor: What is your toolchain/software?** Currently, I finish the additive/3D print before running a second gcode for the subtractive part (contact surfaces, threads, ...). This is far from an efficient and powerful process.
fedilink

The extruder of the 3Dgence P255 3d-printer features a brush to clean the extruder gear.
fedilink

It’s easier than printing two materials: e.g. colorFabb varioShore TPU

low print temperature: “solid” material

high print temperature -> foaming agent reacts -> light weight & soft material

There are also other technologies out there including toolchangers with 2k (2 component mixing) print heads.


Needed as soon as possible a spool holder for larger spools so printing anything that is dozens of hours was out of the question. Solution? Looked at the heavy shelves and had an idea. One remix later, a 1-hour print and with some round wood that was lying around this spool holder was born. I like the position of the spool so much that it is here to stay.
fedilink

I don’t think the MK4 is a good value in this case. You are already familiar with setting up and maintaining a budget printer as such it just works of Prusa isn’t as critical.

The answer might be your current printer: Octoprint and opensoucre are possible, bed leveling is build in, enclosure can be build but not ideal for bed slinger and size upgrade is the only point not feasible.

What are you looking for if this isn’t an option?

  • Enclosure -> coreXY, etc. | no bed slinger
  • OpenSource -> no BambuLab P1S
  • OctoPrint -> this is rough. Most printers ship with Klipper. Maybe a DIY-kit so you could choose.
  • larger than neptune 2 -> larger than 220x220x250mm

pre-built options?

  • $400: Kinggroon KLP1: smaller (220x220mm), no Octoprint
  • $600 FLASHFORGE Adventurer 5M Pro: no OctoPrint (klipper), identical printvolume and only klipper part of the firmware is opensource
  • $600 creality K1: no OctoPrint, identical printvolume
  • $700 Qidi Tech X-Plus 3: no Octoprint
  • $900 Creality K1 max: no OctoPrint
  • if you are lucky and max out the budget a used E3D tool changer could be possible (don’t know if Duet 2 [reprap firmware] is compatible with OctoPrint)

DIY-kits (most if not all of them are $1000+)?

  • Voron
  • VzBoT
  • RatRig v-core
  • HevROT
  • BLV mgn cube


Are you looking forward to using it commercially?

Budget is Prusa MK4 price class (1000€)?


Mockup. Will be a few weeks before the real fan is delivered.


With this particular model, Prusaslicer is very optimistic about bridging and support generation: 1. the right side (dark blue) has no support that could help with load-bearing 2. the entire layer will be connected to those two lines 3. more than 5cm long bridges I don't think this gcode will successfully print. How do fix adjust the cura setting to generate a printable output? The model in question is: https://www.delta-fan.com/Download/3D/BUB0612HJ-00.stp
fedilink

Consider reporting this to Prusa. Definitly attach the STL in question.


Recently I fell in love with RepRap firmware (e.g. Duet3D) due to the simplicity of setting it up and modifying things with macros. RepRap boards include Duet 3 offerings and it’s china clones.

If you want a drop-in replacement the BigTreeTech SKR mini E3 is a great option.

Want to upgrade to klipper? BigTreeTech Manta E3EZ. In addition to the controller/mainboard, a CB1 or any other Raspberry Pi CM4-compatible module is required.

There is also the Makerbase/MKS Skipr but I don’t have first-hand experience with this board. Upside it’s cheaper as it has the Rockchip RK3228 for klipper on board.


Prusa mini: https://www.printables.com/model/121773-prusa-mini-nozzle-cam-mount-arducam-ov5647-w-m12-l

There are two generic formfactors: round/bore and square PCB/camera. Likely you will find a premade mount for your printer.

Make sure to buy a camera with adjustable focus.


What cameras did you add to your 3D printer? What is your favorite camera angle? For me, the nozzle cam watching the first layer is my personal favorite (OV9281 image sensor).
fedilink

Used prices were in a free fall. A Cr10s pro v2 is now around $100-150.

If your price is spot on it might just take a few weeks for a potential buyer to see it as those aren’t the typical beginner printers and print farms/businesses use different machines.


Country/location and printers?

e.g. In Germany facebook is dead but from what I hear it is still used in the USA. Smiliar a Ender 3 has a diffrent target audiance than a Raise3D.


BambuLab A1 mini without AMS. The A1M-NY-10 code might still work (would be 280€).

From the list provided the Creality Ender 3 V3 SE is the best option.


BambuLab recall: Should you replace the cable yourself? ft. EN 50678
As you might be aware BambuLab issued a recall for the BambuLab A1 3d-printer. In particular, the issue is the mains-voltage (230V AC) heat bed cable. As a resolution, they offer two solutions: 1. Ship the entire printer back to them and receive a replacement printer. 2. They mail a new cable and you install it. What BambuLab doesn't mention at all is the test according to EN 50678 *(Verification of the effectiveness of protective measures of electrical equipment after repair)*. Unless you can perform this test I would recommend choosing the printer replacement.
fedilink

Try the JLCPB resin: https://jlc3dp.com/3d-printing-quote

For PCBway: For me, they are blacklisted. They screwed up my initial PCBl order by changing (without communication or disclosing that changes where made between quote and invoice) the quote/order. In particular, adding options that let the cost skyrocket without any additional value for me or even work for them. They tried a money grab.

the project only has the parts for one side. Is there an easy way to mirror everything ?

First make sure that you can mirror it to get the other half. If this is true download prusa slicer, drop the file in it, mirror, right click it and select save as STL.


Right thought. Wrong answer:

Build an air-tight box and use orange gel.


Look promising. Sadly the carbon rods aren’t replaceable.

How long does it take to prepare a print (from hitting print to extrusion starting)? Any issues you had?

I am looking for a small footprint printer that just spills out parts nonstop with a 0.6 or 0.8 mm nozzle. Nothing crazy: mostly PLA.


Most prints fit within the small build volume and a small printer means more printers within the same space. more printer means faster.

Why? Large nozzle and increased layer height mean more flow at the same speed. Approx. 2-4x as much flowrate is required compared to a 0.4mm setup.


Interesting as it isn’t a bed slinger. In this case not ideal: with 406mm it’s 5cm wider meaning 1 printer less per shelf. Also isn’t made to pump out parts quickly with a 0.6 or 0.8mm nozzle.


I do care and that’s why at 400€ I would go with them but with 320€ vs. 520€ you have to put a lot of emphasis on this point.

As compromise to split it between Prusa and BambuLab isn’t feasible either. You want a standardized setup to keep it simple. Meaning all Prusa or all BambuLab.


Would you still buy a Prusa Mini+?
Right now looking into bang for the buck workhorses with a small footprint/build volume. A description that fit the Prusa mini+ perfectly in the past, but it feels like Prusa is a dinosaur that hasn’t moved with the times. **So who is still buying the Prusa mini+ and why?** Personally: While Prusa has outstanding support, good data protection, and does good things but there is now the Bambu Lab A1 mini. Prusa mini is at the moment 500€ plus 20€ for a filament sensor (sic., it’s nearly 2024 and that’s an paid upgrade on half a grand printer) and another 7€ for WiFi. Bambu Lab on the other hand is 320€. Looking at the specifications, the A1 looks like a clear winner: For maintenance, there are three tasks: 1. cleaning and lubricating the mechanics (both are the same in this respect); 2. cleaning the build surface (both are the same); 3. maintaining the hotend and here Bambu Lab is clearly the better system as you can replace the nozzle in just a few seconds compared to Prusa’s E3D v6 hotend, which requires hot tightening. The operation is not that different. Both support network, web interface, and automatic bed leveling probed at the nozzle. Bambu Lab has a camera built in, but this requires the printer to be connected to the BambuLab cloud, which may not be possible as the model data is shared with/uploaded to China. I would say this is still a strong point for Prusa as privacy is not an issue with their printers which means they can be easily deployed. Performance should be close with input shaping enabled, but the A1 mini has the higher flow rate hotend, which means BambuLab is once again the winner (still no highflow at only 28 mm^3/s but twice the flow of a Prusa V6). The build volume is identical and the footprint is also almost identical, so again no point where Prusa beats BambuLab. Value? I have already mentioned it. 1.6 Bambulab for the price of 1 Prusa is a clear answer. If Prusa still had the 400€ original launch price and a filament runout sensor included, maybe the answer would be Prusa due to privacy/easier integration. The 200€/printer price difference is so significant that I don’t see who is still buying multiple Prusa mini+. Btw. is there another printer on the market that just works paired with a small footprint and excellent value?
fedilink

I wouldn’t mind spending this money if it is rock solid and good performance. It probably will be reliable and with the Hermes/Hemera gear issue E3D shown they take care if it goes wrong. For me, it fails because of the performance.

Additionally, E3D isn’t alone and their prices are already going to the absolute max. they could charge. Currently, I have high hopes for the Smart Orbiter V3 ( https://www.orbiterprojects.com/so3/ ). The v2.0 is very reliable and the v3.0 finally shortens the filament path and adds comfort with the over the top leaver design.


Your though on E3D Revo Roto extruder?
Today E3D launched their latest extruder. What's your thought on the Revo roto? only/first Reviews: Made with layers (formally Thomas Sanladerer): https://www.youtube.com/watch?v=X5UpN0QaxGY E3D launch video: https://www.youtube.com/watch?v=W6GxPZUM0k4 product page: https://e3d-online.com/products/roto-extruder 155 GBP (without tax) for the sensor version. Equipped with a normal brass nozzle and a low-power heater core. The pushing force isn't great as it can't do more than 6mm/s (14mm^3/s, approx. 60g/hour) limiting it to 0.15, 0.25 and 0.4mm nozzles. That's significantly short of the E3D Hemera XS Revo performance they claimed this extruder matches. **Is 14mm^3/s enough for 200 USD+ extruder for 2024 and beyond if you could trade approx. 20g more weight for 4x the max. flowrate?**
fedilink

3D-model collections like Printables or Thingiverse are awesome. Required (ASAP) a CPU socket cover to ship the motherboard. Found it online and 15 minutes later I had the part on hand.
fedilink

Keep an eye on the small stands. Those are small companies or startups that have exciting products/ideas.

r does someone want to ask/know something specific from the people who are gonna be there?

What are you interested in?


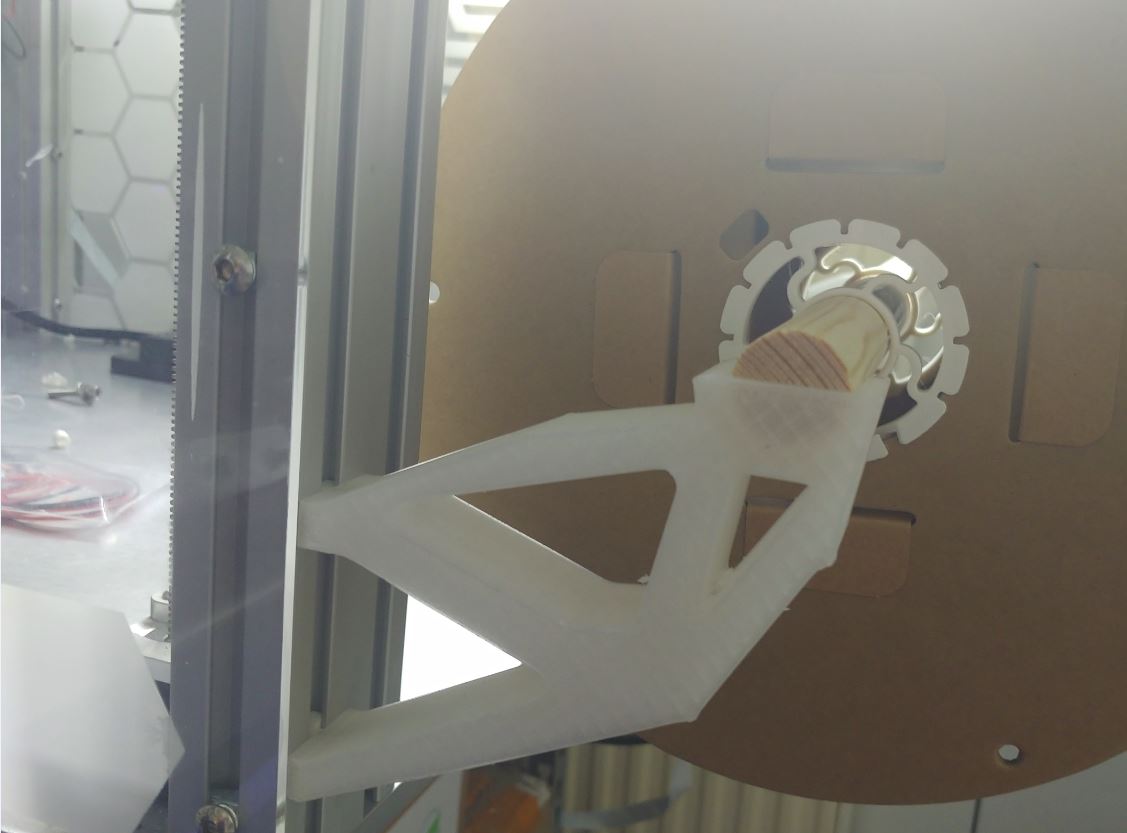
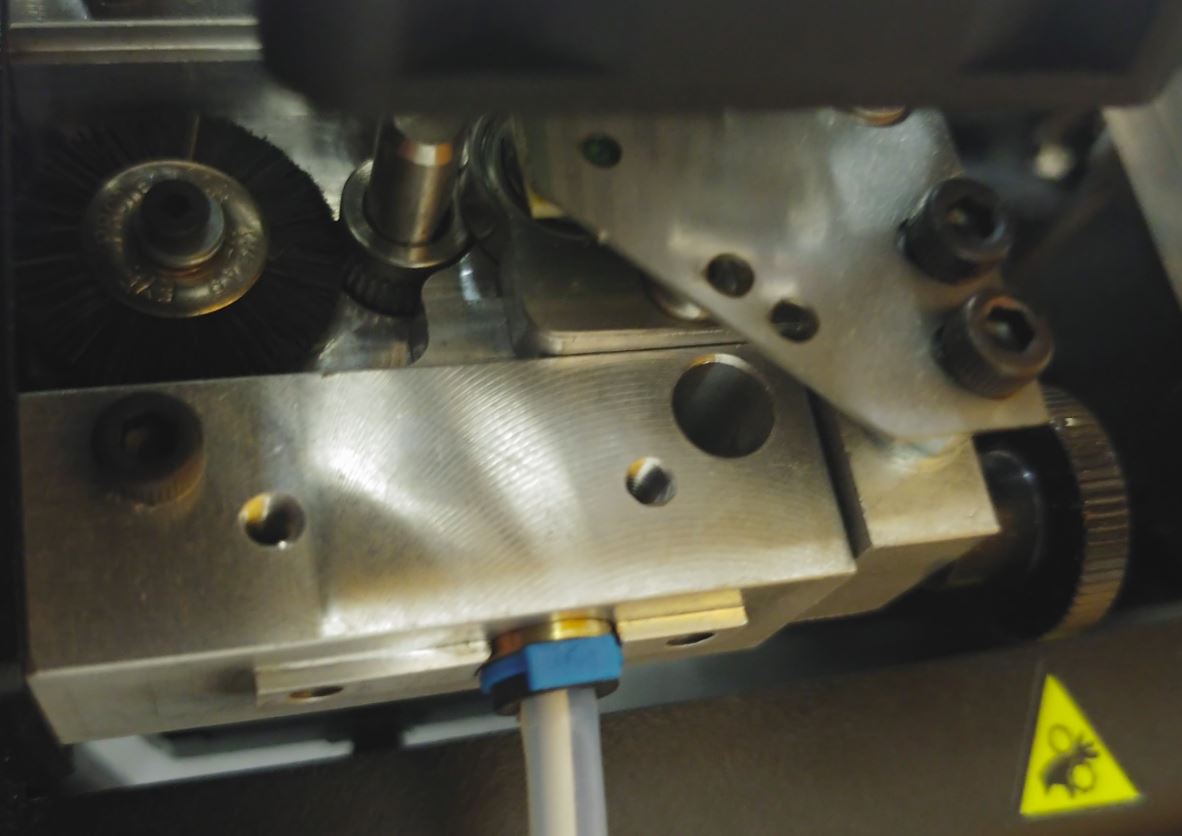
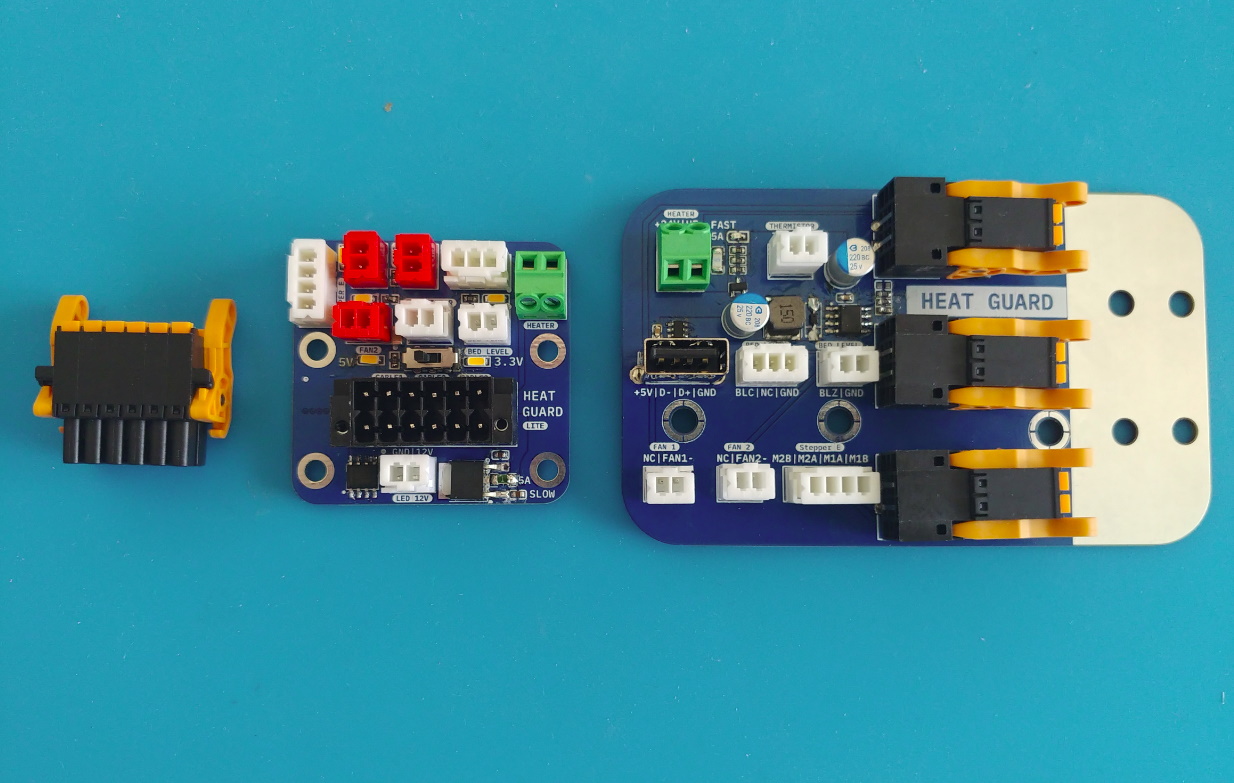
A little bit more background: I wanted a small drag chain with a bending radius not larger than the height of the toolhead.

more conductors = thicker cable = larger bending radius = bad (this application)

What can I do?

multiple cables = more cables but thinner = smaller bending radius = good

What drag chains can I buy?

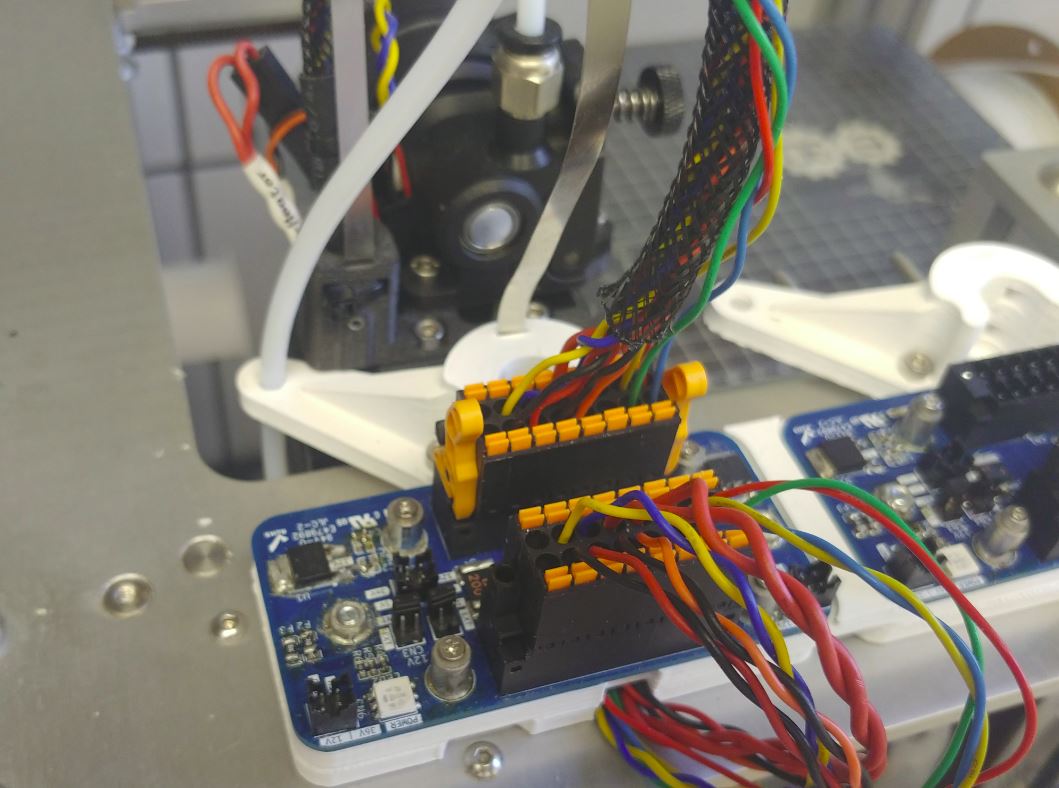
At most I can fit 3 cables within those small chains. How many conductors do I have to work with? 12

4 conductors are required for the stepper motor. This means I have a total of 8 left. With some combining (e.g. not running nets/connections that would be anyway joined on the mainboard) and generating the voltages locally you can actually wire an entire hotend with 8+4 conductors. None of the commercials available have done that. With the CAN options it’s nolonger an issue as there are cables with thick power/GND conductors and controlled impedance for the two CAN data lines.


Three years ago I looked into properly wiring hotends with quick toolhead swapes and came up with this: Combining the entire hotend wiring into 3x shielded 4-conductor cables (thin cables for small drag chains with tiny bending radius) and options to terminate the shield. The static side features an USB-port to retrofit Raspberry Pis and a step down to generate the 5V supply from a single 12 or 24V power input. For the moving side/hot-end PCB it's a similar story: - stepdown to 12V for fans and LED lights - stepdown to 3.3V and 5V - selectable logic voltage (3.3V, 5V) - temperature and humidity sensor (feedback for heated chambers: adding a measurement point close to the print or being able to measure any point within the chamber to check for uniformity during development) Why did it all fall apart? BOM cost. Those connectors with locking lever for easy removal cost a fortune and the 3D-printing world moved on to CAN. For the active version of this, it's a different story. Never figured out how to make it plug-and-play/foolproof (active circuit for safety features (contact resistance, overtemperature, fan failure, etc.) as well as preemptive maintenance (heater wear, fan bearing degradation, and more).
fedilink

Pen holder with an integrated ruler and USB-stick storage in the top cap. ![](https://3d-cnc.de/share/2023/lemmy/EDC/1.jpg) ![](https://3d-cnc.de/share/2023/lemmy/EDC/2.jpg) ![](https://3d-cnc.de/share/2023/lemmy/EDC/3.jpg) ![](https://3d-cnc.de/share/2023/lemmy/EDC/4.jpg)
fedilink

Two options:

1.GFK road as a stiffener.

  1. Energychain/dragchain.

If you want it simple and cheap use the GFK. Otherwise, opt for the drag chain. If you need help selecting the chain feel free to ask. Btw. Upgrade to the Biqu CAN hotend/adapter and use a single can-bus/fieldbus cable.


Let’s say the chemicals aren’t healthy. Disclaimer: RTFM (MSDS and technical datasheet) and consult with professionals.

There are a few issues here at play. One major issue is that repeated exposure has a risk of sensibilization. Once this happens there is no way back. Your life will change.

The consumer industry has already moved. I remember explaining to Anycubic sales what an MSDS is and why I need it (if you need a good argument in such conversations: REACH). These days you can download it on their website.

To this day the packaging might not be CLP conform. At least their marketing got better: Water washable has now a section about waste treatment but plant-based resin is still advertised as “low odor and safe to use” or “truly environmentally friendly”. Worst of all they still suggest that the odors are safe to breathe as everything is soybean-based: The truth is they aren’t and neither is it soybeans. What once was soybeans is heavily modified.

Sadly this is not just an Anycubic issue.

Btw. If you use Anycubic though resin: According to their MSDS they switched the product and kept the name the same (approx. 2 years ago).


They do and it’s China. That’s why I measured it in the first place as I wasn’t sure they get the area around 400-430nm without gaps where you still have significant emissions from the LEDs.

The good news this particular color blocks all the wavelengths without gaps.


SLA resin 3D-printing: Do the orange window stop UV or sunlight? Is it stopping the UV radiation from the printer?
Have you ever wondered if the yellow/orange plastic windows that all resin/SLA 3D printers have are sufficient? Here's your answer: ![](https://lemmy.ml/pictrs/image/be0e782f-d0f6-4648-9152-821c455d7ba3.jpeg) interesting data points: - 500nm: 54.9% (transmission) - 490nm: 37.9% - 480nm: 16.9% - 470nm: 1.6% - 460nm: 0.3% **What does this mean? Feel free to comment. ** My take: First of all, this instrument is not designed to measure OD, so it can barely measure down to OD3. The actual value for 400-450nm could be lower (e.g. 0.001-0.0001% transmission). SLA 3D printers work at 405nm. This means that the enclosure will likely protect you from the UV radiation of the printer. This is good news. Does it also protect the resin from sunlight? To answer this question, it is important to understand how the resin behaves to wavelengths above 460nm (not measured). In my practical experience, it does not provide adequate protection. Clean the vat after each print or add another light-blocking layer for (short-term) storage.-
fedilink

Personal opinion: While the tool changer is a great development kit it never was a finished product and with the Prusa XL, which E3D likely assisted with, it's time might has come. Nonetheless, I think there is still value for the toolchanger: Nicely CNC-milled aluminum parts paired with 200°C heatbed at half the price of Prusa. Not to long ago they sold the toolchanger at a massive discount (approx. 1500 GBP for the 4 tool head hemera xs revo) and assured it isn't discontinued. Claiming it was a mistake they will fulfill and did fulfill. With this sad this might be another nail in the coffin for hybrid subtractive-additive manufacturing (what E3D calls ASMBL) in the hobby/budget sector. Btw. This product started as a passion project of Sanjay Mortimer and others. If you want to learn more (MERF 2018, Sanjay): https://www.youtube.com/watch?v=DRkF-D0fEbQ . . E3D announcement: TLDR: Discontinuation of the E3D ToolChanger and Motion System We are writing to inform you about an important update regarding our ToolChanger and Motion system - a showstopper product that has been an integral part of our innovation journey over the past seven years. It is with sadness that we must announce the end of life for this remarkable machine. Read on for what this means, open source details, spares availability and what’s next. Throughout its lifespan, we have been amazed by the incredible ways in which our customers have utilised the machine. The passion and creativity demonstrated by the 3DP community in creating their own tools and pushing the boundaries of research and development have been truly inspiring. It was their innovative spirit that motivated us to take what was initially a ‘weekend passion project’ (as dubbed by Sanjay) and turn it into a commercially viable machine. What was our objective with the E3D Toolchanger? We’ve always been passionate about the possibilities with multiple toolhead machines. With the E3D Toolchanger platform, our objective was to encourage adoption of this type of system. And we’ve succeeded. Looking at the market today you will see many examples of multi-tool systems, from the first Jubilee printer, to the Prusa XL 5-tool system, to the recent successful Proforge British Kickstarter by Makertech. We are also really pleased to say you’ll be seeing even more toolchanging 3D printers in the future – of course, they’re hush-hush for now, and we’ve said nothing, but keep your eyes peeled. There are now 1000’s of E3D Toolchangers out there in the wild, being used in state-of-the-art research and development facilities, universities, and leading tech companies. We’re very proud to be enabling incredible R&amp;D, some of which we’ve been lucky enough to see for ourselves. However, as E3D evolves, we have made the difficult decision to discontinue the ToolChanger and Motion system. While it brings us sadness to part ways with such a remarkable product, we recognise the importance of focusing on our core expertise in FDM extrusion systems. This strategic realignment will enable us to better serve you with our primary product offerings and ensure continued excellence in those areas. We want to assure you that although we will no longer be manufacturing the ToolChanger and Motion system, the machine remains entirely open source. All the files related to the system will continue to be available, allowing everyone to leverage its design and build upon its foundation. We believe in the power of collaboration and the spirit of open source, and we are confident that the legacy of the ToolChanger and Motion system will live on. We understand the importance of ongoing support for our valued customers and will continue to offer spare parts for the ToolChanger and Motion system until the stock run downs. We will also continue to sell blank tool plates for the foreseeable future. This commitment ensures that ToolChanger users can still maintain and repair their machines, providing longevity and reliability even after the discontinuation. We will also be continuing to work with 3D printer manufacturers wishing to develop their own systems, now that we’ve spent years developing in-house expertise in this area, and a strong, reliable supply chain. Thank you all for your support of our ToolChanging journey over the years and an extra special thanks to Rene Jurack for all of his awesome ToolChanger videos - you helped so many kick off their ToolChanger journey, truly earning the TC Guru title! While we say goodbye to the ToolChanger and Motion system, we are very much looking forward to the future and can't wait to share details about our product roadmap with you all very soon! Some ToolChanger highlights over the years: There are still a handful of machines if you want to get your hand on one of the last-ever ToolChangers, but you’ll need to be quick! We love to see your ToolChanger content so please continue to tag us across all of the socials using #E3DToolChanger. Team E3D
fedilink

PETG: ![](https://lemmy.ml/pictrs/image/b4916855-4234-47b3-8b4d-aa2aae5fc9a6.jpeg) resin: ![](https://lemmy.ml/pictrs/image/1741bcdc-4607-4eb4-bbc6-b7e01a2d0c25.jpeg)`___` sidenote: 315-400nm is UVA.
fedilink